Learn to solder!
This tutorial will show you the basics of how to solder. In the video below, we’re going to solder this cool Whaddy gadget that has two blinking LEDs! So go and watch the video and learn to solder!
Good to know: all children under the age of 14 need to be guided by a responsible adult! Soldering is fun and educational, but be careful when holding a soldering iron! Read the safety instructions below.
All our soldering kits include an illustrated manual. Be sure to read this manual carefully and follow it step by step!
You can also read the tutorial below, which will show you how to solder a basic component.
What is soldering and how can you learn it?
Soldering is a way of joining different kinds of metal together like iron, silver, and copper. We can do this by melting what is called ‘solder’. Solder is the form of ‘glue’ that we are going to use. But in our case, we need to melt the solder by using a hot soldering iron. By doing so, we can connect different electronic components to each other and into an electronic circuit for a small device, or machine.
The right tools


You will need a soldering iron and holder, or a soldering station which is preferable. You will also need solder, cutters, and a sponge to clean your iron. The cleaning sponge is not included in the set, but you can use a regular kitchen, bath, or car sponge. Just be sure to make it wet. Also, if you want to protect your table, you can also use an antistatic placemat.
Place the soldering iron on your right side if you are right-handed, and left if you are a lefty.
If you’re looking for a starter set, our start to solder sets are all-inclusive. They include two soldering kits, a soldering iron with holder, cutters, and solder. Perfect for kids! We also have a Holiday edition.
Safety first!
Before we start learning how to solder, we will explain some important safety rules!
To heat up the solder, your soldering iron will heat up to about 300°C! Therefore, it is very important that you hold the soldering iron correctly and always place it back into the holder. Hold the iron like a pen, but only touch the plastic part. Never ever touch the iron part of the soldering iron!

Let’s get to it!
Some cool Start to Solder Projects


Learn to Solder right now!
Step 1: Start by plugging in your soldering iron so it can start heating up.
Step 2: clean the tip of your soldering iron with a suitable sponge. Make sure the sponge is a little wet.

Step 3: Insert the correct component into the right designator on the PCB. Place the component all the way against the PCB.
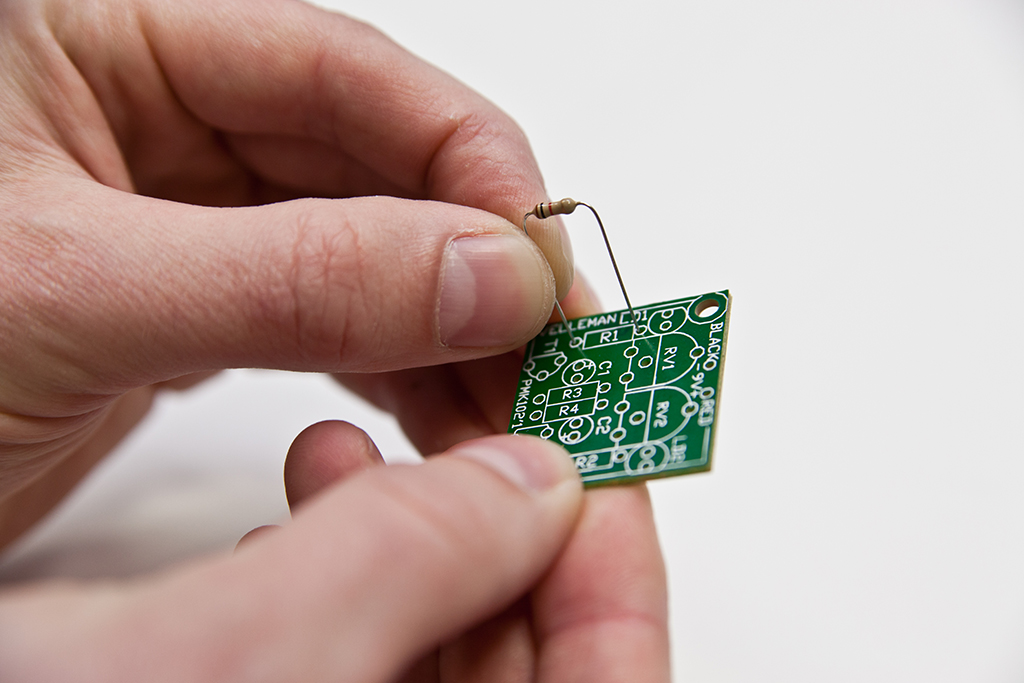

Step 4: Bend the leads a little bit.
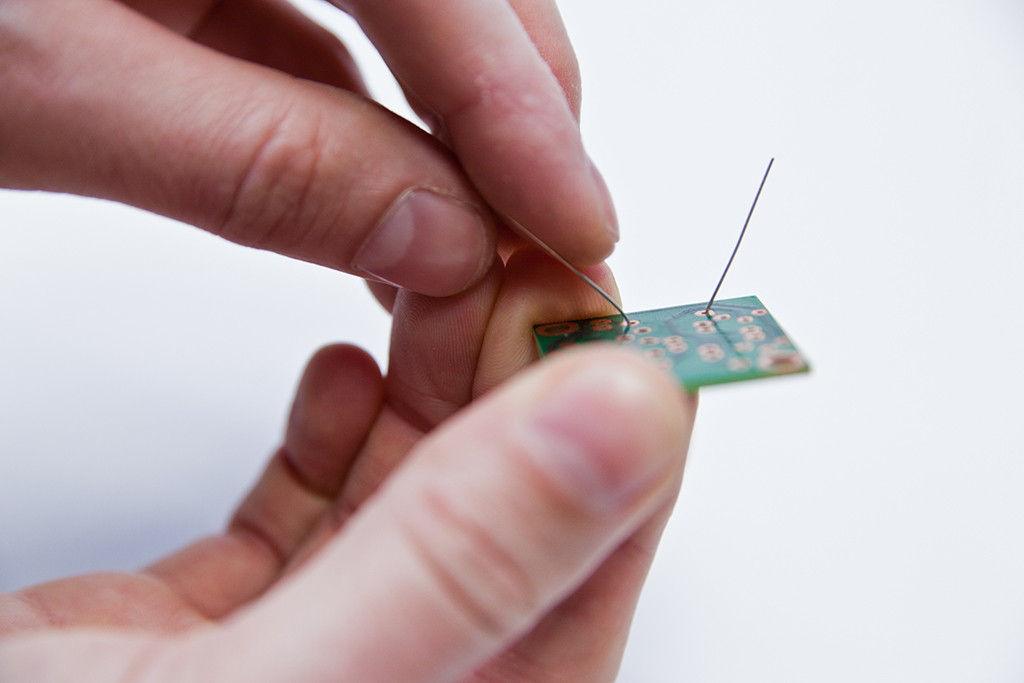
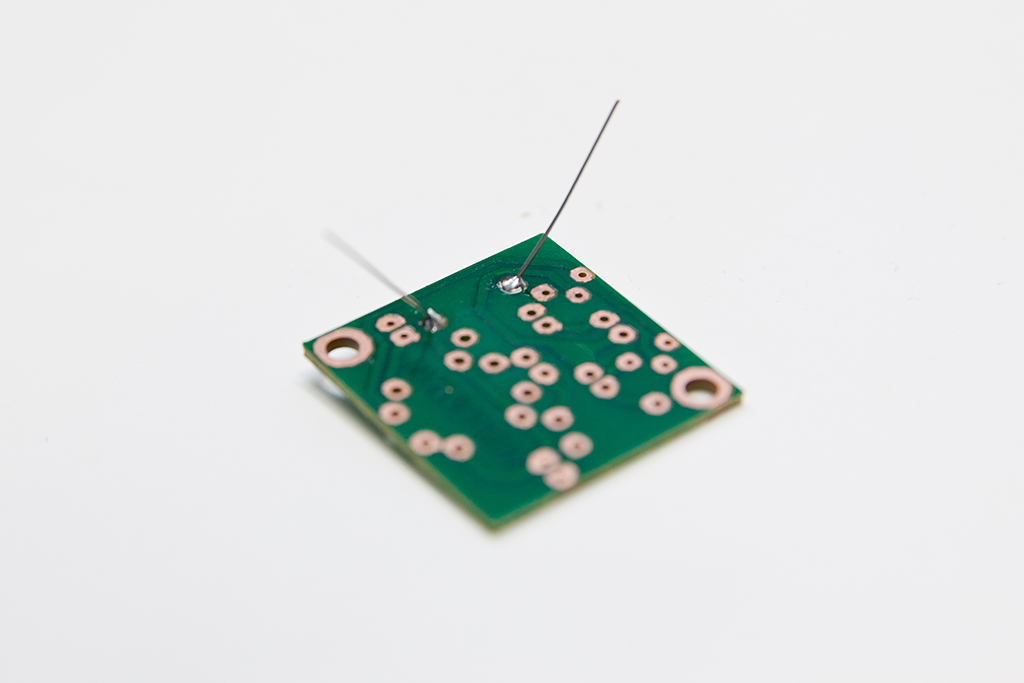
Step 5: Heat up the path and the lead by using the tip of your soldering iron. Then apply the solder until you get a cone shape, as shown in the picture.


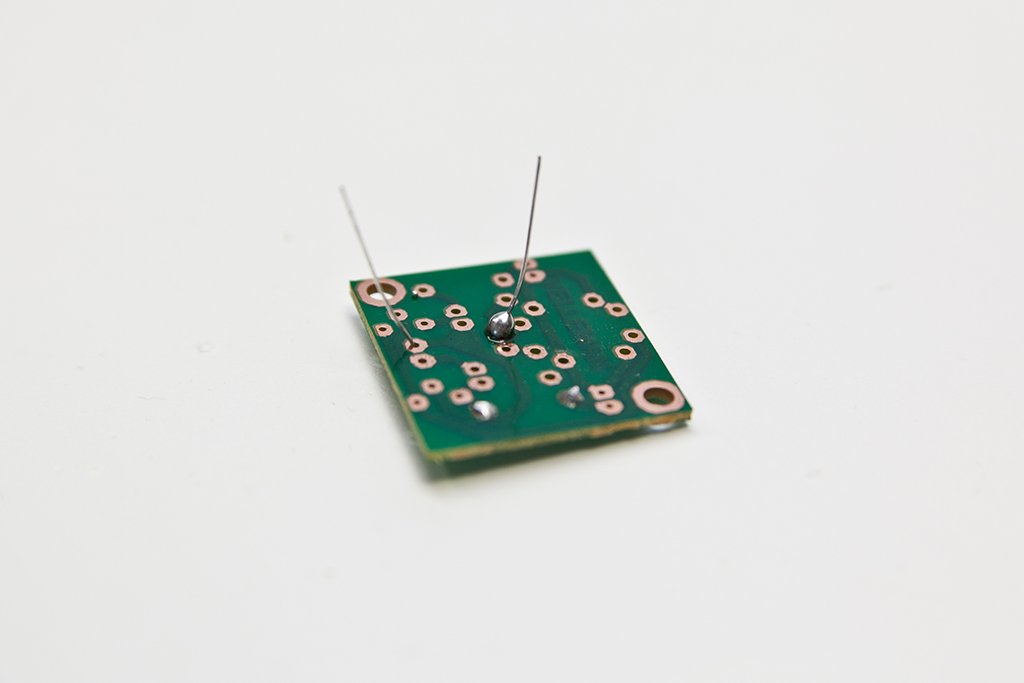
Step 6: Remove the solder and soldering iron. This is the perfect soldering connection:
These are some examples of bad connections. Above there is too much solder and too little solder. Below there is a connection that had too much heat because the soldering iron touched the connection too long. And the other is simply a bad contact.


Step 7: Cut off the rest of the lead. Cut close to the connection.

Step 8: Inspect the connection. Now do solder the other connection!


